Description
1 Delicious Ethiopian Kocho Recipe, Embark on a captivating journey into the heart of Ethiopian cuisine with Kocho, a revered delicacy crafted from fermented ensete pulp. Beyond being mere bread, Kocho embodies a cultural emblem and a testament to human creativity. This recipe guide unveils the intricate steps involved in preparing Kocho, unravelling the mysteries behind this cherished Ethiopian treasure.
The Ensete Plant: A Natural Marvel
Our odyssey commences with the ensete plant, a resilient species thriving in the Ethiopian highlands. Unlike its banana counterpart, ensete’s significance lies not in its fruit but in its starchy corm, a subterranean reservoir of energy. Esteemed as “the gift of life,” this versatile plant furnishes Ethiopians with sustenance, fibers, and even construction materials.
Selecting the Ideal Ensete Corms
Critical to achieving the perfect Kocho is the meticulous selection of ensete corms. Optimal corms are mature, typically aged three to four years, boasting higher starch content for superior results. Look for firm corms with minimal imperfections; any softness or discoloration may indicate spoilage, compromising the fermentation process.
Preparing the Ensete Corms
Upon securing the desired corms, the preparation ritual commences, often a communal endeavour, particularly involving women:
Peeling: Gently strip away the outer layers of the corm using a sharp knife, unveiling the pristine, starchy interior. Protective gloves are advisable, given the mildly irritating nature of ensete sap.
Chopping: Slice the peeled corm into manageable sections, typically two to three inches thick, tailored to the chosen fermentation method. While smaller pieces expedite fermentation, they may yield a less cohesive final product.
Washing: Thoroughly rinse the chopped ensete pieces under clean water to purge any extraneous matter, safeguarding against contamination during fermentation.
The Fermentation Process: A Revelation in Transformation
At the heart of Kocho’s allure lies its fermentation, a time-honored technique that unlocks profound flavour metamorphosis. Here, we delve into two prevalent fermentation methodologies:
Method 1: Pit Fermentation
Excavate a pit in well-drained soil, approximately three to four feet in depth and breadth, lining its base with banana leaves or comparable vegetation.
Layer the chopped ensete pieces snugly within the pit, minimizing airspace, and interspersing wild leaves renowned for their antibacterial properties between ensete strata.
Secure the pit’s top with banana leaves or equivalent material, weighting it down with soil or stones to maintain submersion of the ensete pieces.
The fermentative alchemy unfolds underground over several weeks or months, orchestrated by indigenous microorganisms that break down starches into lactic and other organic acids. These transformative acids impart Kocho’s signature tanginess while bolstering its shelf life.
Method 2: Above-Ground Fermentation
For those lacking pit-accessible terrain, an above-ground approach suffices:
Utilize spacious clay pots or wooden barrels, ensuring their cleanliness and freedom from contaminants.
Pack the containers tightly with chopped ensete pieces, minimizing air pockets.
Supplement the contents with water to foster a conducive, moist fermentative environment.
Seal the containers with lids or banana leaves, adding weight to maintain submersion of the ensete pieces.
The fermentation duration for the above-ground method typically ranges from four to eight weeks, slightly shorter than pit fermentation.
Monitoring the Fermentation Process
Regularly inspect fermenting ensete for olfactory cues of progression. An agreeable, subtly sour aroma signals healthy fermentation, while any unpleasant odors, such as ammonia or sulfur, warrant discarding the batch due to spoilage.
Harvesting the Kocho: The Culmination of Fermentative Artistry
Upon reaching optimal fermentation, harvesting your Kocho entails a sensory evaluation:
Pit Fermentation: Carefully unearth the pit, unveiling banana leaves and inspecting the ensete pieces’ darkened hue compared to unfermented corms.
Above-Ground Fermentation: Unseal the containers and observe softened, darkened ensete pieces akin to pit-fermented counterparts.
Processing the Fermented Ensete: A Labor of Love
Post-harvest, communal processing of fermented ensete ensues:
Extraction: Gently retrieve ensete pieces from the pit or containers, employing gloves due to the pungent odor and slippery texture.
Washing: Briefly rinse ensete pieces under clean water to dislodge surface impurities, avoiding excessive washing to preserve beneficial bacteria.
Optional Sun-Drying: In sunnier climes, expose rinsed ensete pieces to direct sunlight for enhanced flavor and surface drying.
Pounding: Utilize large wooden or stone mortars and pestles, or sturdy wooden clubs, to pound ensete into a cohesive, dough-like mass, breaking down softened fibers.
Concluding the Kocho crafting odyssey entails shaping and preserving your creation:
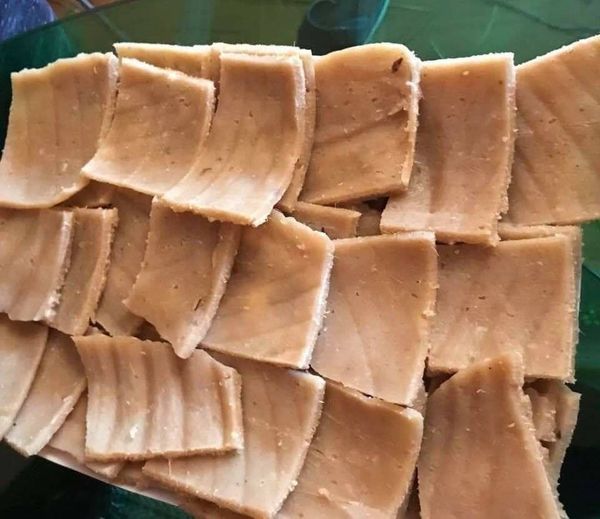
Shaping: With moistened hands, mold pounded ensete dough into desired shapes, sizes, and thicknesses.
Air-Drying: Position shaped Kocho on clean, ventilated surfaces, allowing several days for air-drying until firm with a slightly hardened exterior.
Storage: Safeguard Kocho’s longevity by storing it in cool, dry, well-ventilated spaces, typically woven baskets or clay pots lined with banana leaves to deter moisture and pests.
Enjoying Your Kocho Creation: A Gastronomic Revelation
Celebrate the fruits of your labor by savoring homemade Kocho within the context of Ethiopian cuisine:
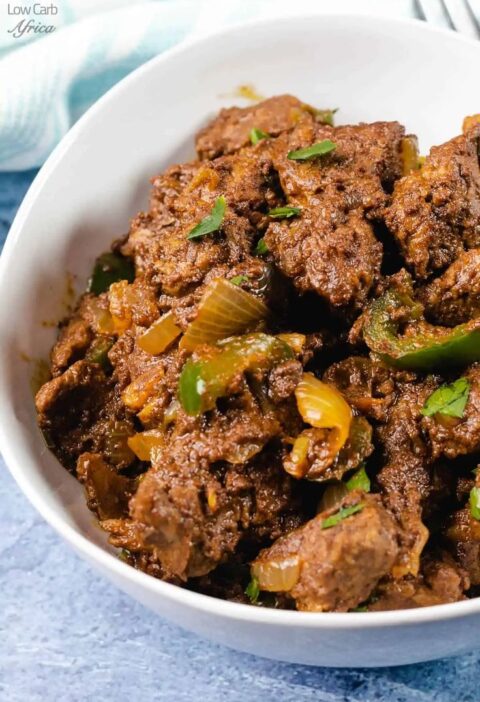
Kitfo: Employ Kocho as a vessel for savoring Ethiopian stews like kitfo, a spiced minced meat delicacy.
Ingredients
Instructions
- Chop the Kocho and remove the fiber from it as thoroughly as possible.
- Use a bowl to mix the Kocho with water and salt, and knead thoroughly.
- Then spread the Koba leaves on a clean table and place the dough over it.
- Then roll it and flatten it to its desired shape and thickness.
- Cover the top of the Kocho with the Koba leaves, and bake it using a heated oven until all sides are cooked.
- Then remove the Kocho from the oven and remove the Koba leaves as well.


